

 Thomas is studying Law. Just at high school, that is, but it seems the teacher is keeping it pretty interesting. They are finishing the term with a mock trial, and Thomas gets to be the judge! So, with a couple of days notice, we needed to come up with a judges wig.
Obviously, a simple costume is just fine for cases like this, and I never feel we should get too stressed about the things, we should focus on the experience. But then again, a chance to try making something you've never made is an experience too. So Thomas and I agreed to make a wig.
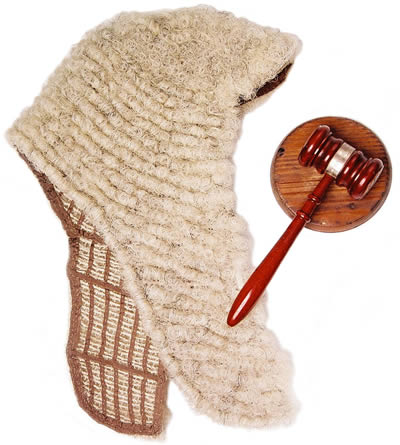
First, we do a little research. The University of Tasmania provides us with this, a very clear photo of what a real wig looks like. Thanks, UTas!
The Department of Justice of Queensland provide us with this cardboard cutout, so if it all goes to pieces, there's our fallback. Thanks, DoJ!
Rosie at Pondicherry Cottage has made some cool wigs, and shown them on her blog. Her material of choice was quilt batting - now, that sounds good!
Squidoo has step by step directions to create a similar wig. We are well on the way.
We bought a piece of cheap quilt batting - at our local Spotlight, $7.99 got us 1m x 1.22m, which was more than we needed. We also found a knitted beanie nobody was wearing.


I sewed the batting to the edge of the beanie, trying to tuck the rounded shape around the beanie - it was rather gathered at the back.

Here we are with the beanie fully sewn. That's the end of the sewing! Good thing too. I freely admit, my workmanship is not that great here.

Here's what we are going to use instead of sewing from here on. Split pins, available from the stationery shop. These are quite big - you could manage with slightly smaller ones, but not with tiny ones.

Get to cutting some rectangles. About 14cm long, and the width to match the width of the "tails" on your wig. How many? Depends on how long the tails are.

Now, we attach rolls to the tails. Roll up one of your rectangles (letting the start and end overlap). Hold the overlapped part of the little cylinder against the bottom edge of one tail of the wig. Wiggle a split pin into the middle of the roll, about two centimeters from the outer edge, and push its legs out through all three layers of batting.

Open out the legs of the split pin. Repeat with a second split pin at the other end of this roll.
By the way, we tried using a hole cutter to make holes, but it turned out unnecessary for this material.


And repeat all the way up the tail of the wig, until it looks like enough!
This is the inside view of one of the tails.

Justice Thomas will hear your case now.
This project took about an hour from getting home from Spotlight, to posing for photos, so I think we can say it was a success.
And it turns out, in the mock trial, the defendant was found guilty of manslaughter. The judge was reasonably tough in his sentencing decision. But I think we were expecting that.
2 comments:
Hi Pauline! I realize I'm like 4 years late in commenting. Anyway, I came across the picture of your son in the wig and he is a doppelganger for at least two boys in our family. I'll happily mail a picture if you're as amused by these things as I am, just let me know in a comment.
Lovely wig :-)
Shlomit
Well, I think you need to know that the term is tripleganger. Thomas has an identical twin. The wig didn't take, he's an IT guy now.
Post a Comment